WooCommerce is a popular plugin that allows you to create and manage an online store with WordPress. One of the features of WooCommerce is that it lets you organize your products into categories and subcategories, which can help your customers find what they are looking for more easily.
However, the default WooCommerce category page may not suit your needs or preferences. You may want to change the layout, style, content, or functionality of the category page to make it more attractive, informative, or user-friendly.
In this tutorial, we will show you how to customize the WooCommerce category page using different methods, such as plugins, code snippets, or page builders. We will also give you some tips on how to optimize your category page for better conversion rates.
What is a WooCommerce Category Page?
A WooCommerce category page is a page that displays all the products that belong to a specific category or subcategory. For example, if you have a clothing store, you may have categories such as men’s, women’s, kids’, accessories, etc. Each category may have subcategories such as shirts, pants, dresses, shoes, etc.
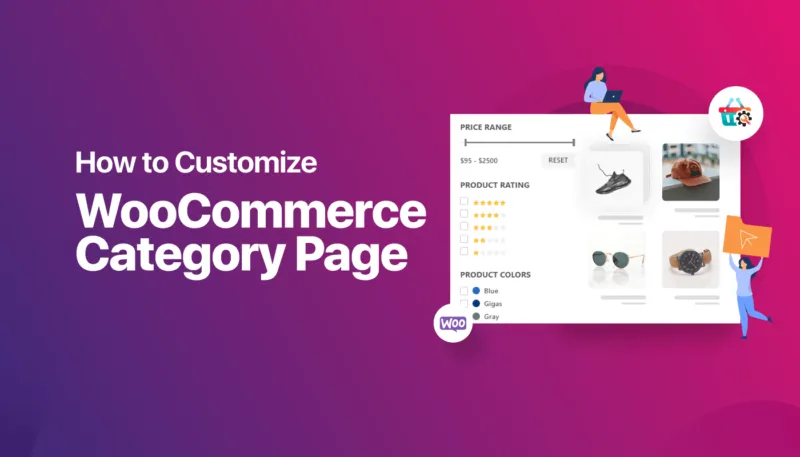
By default, the WooCommerce category page shows the product name, price, rating, and add to cart button for each product in a grid layout. It also shows the category name, description, and thumbnail at the top of the page.
As you can see, the default WooCommerce category page is quite simple and basic. It may not be very appealing or engaging for your customers. That’s why you may want to customize it and make it more unique and attractive.
Why Customize the WooCommerce Category Page?
There are several reasons why you may want to customize the WooCommerce category page. Here are some of them:
- Boost your sales: The category page can influence your customers’ buying decisions. If you can make it more appealing and persuasive, you can increase your sales and revenue. For example, you can add more information about your products, such as features, benefits, reviews, testimonials, etc. You can also add filters, sorting options, pagination, etc. to help your customers find the best products for them.
- Improve your SEO: The category page can also affect your search engine ranking and visibility. If you can optimize it for SEO, you can drive more organic traffic to your store. For example, you can add keywords, meta tags, schema markup, breadcrumbs, etc. to your category page to make it more relevant and user-friendly for search engines and users.
- Make your store more eye-catching: The category page can also reflect your brand identity and personality. If you can customize it to match your store’s theme and style, you can make it more consistent and professional. For example, you can change the colors, fonts, images, icons, etc. of your category page to make it more attractive and distinctive.
How to Customize the WooCommerce Category Page
There are different methods to customize the WooCommerce category page in WordPress. Depending on your skills and preferences, you can choose one of the following methods:
Method 1: Use a Plugin
One of the easiest ways to customize the WooCommerce category page is to use a plugin that provides various options and features for editing the category page. There are many plugins that can help you with this task. Here are some of them:
- WooCommerce Product Categories: This plugin allows you to display product categories in different layouts and styles on any page or widget area. You can choose from grid, list, carousel, accordion, or dropdown layouts. You can also customize the appearance and behavior of each layout with various options.
- WooCommerce Category Showcase: This plugin allows you to showcase product categories in a responsive slider or grid on any page or widget area. You can choose from different skins and effects for each layout. You can also customize the title, description, image size, number of columns or slides, etc. of each layout.
- WooCommerce Category Slider: This plugin allows you to display product categories in a beautiful slider on any page or widget area. You can choose from different themes and animations for each slider. You can also customize the title, description, image size, number of slides, autoplay, navigation, pagination, etc. of each slider.
To use any of these plugins, you need to install and activate them on your WordPress site. Then, you need to go to their settings pages and configure their options according to your needs. After that, you need to use their shortcodes or widgets to display product categories on any page or widget area.
For example, if you want to use the WooCommerce Product Categories plugin, you need to go to Settings > WooCommerce Product Categories and choose a layout and style for your product categories. Then, you need to copy the shortcode that is generated by the plugin and paste it on any page or widget area where you want to display product categories.
Method 2: Use Code Snippets
Another way to customize the WooCommerce category page is to use code snippets that can modify the default template or functionality of the category page. You can find many code snippets online that can help you with this task. Here are some of them:
- [How to Add a Custom Field to WooCommerce Product Category]: This code snippet allows you to add a custom field to the product category edit screen and display its value on the category page. You can use this custom field to add any information that you want to show on the category page, such as a banner, a video, a call to action, etc.
- [How to Change the Number of Products per Row on WooCommerce Category Page]: This code snippet allows you to change the number of products per row on the category page. You can use this code snippet to adjust the layout of the category page according to your preferences or screen size.
- [How to Add a Sidebar to WooCommerce Category Page]: This code snippet allows you to add a sidebar to the category page. You can use this sidebar to display any widgets that you want, such as filters, sorting options, categories, tags, etc.
To use any of these code snippets, you need to copy and paste them into your child theme’s functions.php file or use a plugin like [Code Snippets] to add them to your site. Then, you need to refresh your site and see the changes on your category page.
For example, if you want to use the code snippet that adds a custom field to the product category edit screen, you need to copy and paste it into your functions.php file or Code Snippets plugin. Then, you need to go to Products > Categories and edit any category that you want. You will see a new field called Custom Content where you can enter any HTML code that you want to display on the category page. After that, you need to save your changes and visit your category page. You will see your custom content displayed on the category page.
Method 3: Use a Page Builder
The third way to customize the WooCommerce category page is to use a page builder that allows you to create and edit the category page with a drag and drop interface. There are many page builders that can help you with this task. Here are some of them:
- [Elementor]: Elementor is one of the most popular and powerful page builders for WordPress. It allows you to create and edit any page or post with a live preview and a lot of widgets and templates. It also has a pro version that offers more features and integrations, including WooCommerce widgets and templates. With Elementor Pro, you can create and customize your WooCommerce category page with ease and flexibility.
- [Beaver Builder]: Beaver Builder is another popular and reliable page builder for WordPress. It allows you to create and edit any page or post with a live preview and a lot of modules and templates. It also has a pro version that offers more features and integrations, including WooCommerce modules and templates. With Beaver Builder Pro, you can create and customize your WooCommerce category page with simplicity and efficiency.
- [Divi]: Divi is another popular and versatile page builder for WordPress. It allows you to create and edit any page or post with a live preview and a lot of modules and layouts. It also has a theme builder feature that allows you to create and customize any part of your site, including WooCommerce pages. With Divi Theme Builder, you can create and customize your WooCommerce category page with creativity and flexibility.
To use any of these page builders, you need to install and activate them on your WordPress site. Then, you need to go to their settings pages and configure their options according to your needs. After that, you need to go to Pages > Add New and choose the page builder that you want to use. Then, you need to select a template or start from scratch and drag and drop widgets or modules onto your page. You can also edit their settings and styles with various options.
For example, if you want to use Elementor Pro, you need to go to Elementor > Settings > Post Types and enable Product Archive as one of the post types that Elementor can edit. Then, you need to go to Templates > Theme Builder > Add New and choose Product Archive as the template type and give it a name. Then, you need to click on Create Template and choose a
template or start from scratch and drag and drop widgets or modules onto your page. You can also edit their settings and styles with various options.
For example, if you want to use Elementor Pro, you need to go to Elementor > Settings > Post Types and enable Product Archive as one of the post types that Elementor can edit. Then, you need to go to Templates > Theme Builder > Add New and choose Product Archive as the template type and give it a name. Then, you need to click on Create Template and choose a template or start from scratch.
As you can see, you can use Elementor Pro to add and customize various widgets on your category page, such as the archive title, archive description, archive products, archive pagination, etc. You can also add any other widgets that you want, such as a header, a footer, a sidebar, a newsletter form, etc.
To apply your custom category page template to your site, you need to click on Publish and set the display conditions for your template. You can choose to display your template for all product categories or for specific ones. After that, you need to save your changes and visit your category page. You will see your custom category page displayed on your site.
Tips for Optimizing Your WooCommerce Category Page
Now that you know how to customize your WooCommerce category page, you may want to optimize it for better performance and results. Here are some tips that can help you with that:
- Use clear and descriptive category names: Your category names should be clear and descriptive enough to tell your customers what kind of products they can find in each category. Avoid using vague or generic names that can confuse or mislead your customers. For example, instead of using “Accessories”, use “Bags”, “Hats”, “Jewelry”, etc.
- Use high-quality and relevant images: Your category images should be high-quality and relevant to the products in each category. Avoid using low-quality or irrelevant images that can reduce your credibility or appeal. For example, instead of using a stock photo of a model wearing a hat, use a photo of the actual hat that you are selling.
- Write compelling and informative descriptions: Your category descriptions should be compelling and informative enough to persuade your customers to explore the products in each category. Avoid using boring or generic descriptions that can fail to capture your customers’ attention or interest. For example, instead of using “Browse our collection of hats”, use “Find the perfect hat for any occasion from our wide range of styles, colors, and sizes”.
- Use filters and sorting options: Filters and sorting options can help your customers narrow down their choices and find the best products for them. Avoid using too many or too few filters and sorting options that can overwhelm or frustrate your customers. For example, instead of using only price and rating as filters, use other relevant filters such as size, color, brand, etc.
- Use pagination and load more buttons: Pagination and load more buttons can help your customers navigate through your products without scrolling endlessly or waiting for long loading times. Avoid using too many or too few products per page that can affect your site speed or user experience. For example, instead of using 100 products per page, use 20 or 30 products per page.
Conclusion
In this tutorial, we have shown you how to customize the WooCommerce category page using different methods, such as plugins, code snippets, or page builders. We have also given you some tips on how to optimize your category page for better conversion rates.
We hope that this tutorial has been helpful and informative for you. If you have any questions or feedback, please feel free to leave a comment below.
Happy customizing!
Subscribe to our email newsletter to get the latest posts delivered right to your email.
Comments